Showing posts with label dessert. Show all posts

Thursday, August 18, 2011

Candy Bar Explosion Dessert Pizza

A lot of material for my blog comes from my husband.  He is constantly coming home from work, telling me of another potluck.  He almost always signs me up for a dessert.  Seeing he has had several dozen potlucks over the last several years, I keep trying different ideas.

So this time around, he asked for something he could make.  After he had success making my peanut butter cookies on his own, he thinks he's a pastry chef that can tackle anything.  I started throwing out ideas of things I believed he could handle, and he kept vetoing them.  Finally I said, "What about a dessert pizza?"  Aha!!! We found a winner.

To break it down I thought immediately of cookie crust, and I would use my soft sugar cookie recipe.  This recipe is actually quite simple; Jay could handle that.  Then I thought for the "sauce" we could do a ganache, again another simple recipe only two ingredients.  Finally, Jay could surely chop up candy bars for toppings.

So the week progressed, and his work schedule took over.  I knew he wasn't going to be able to make it himself.  So yesterday after dinner, I made the cookie dough so it could refrigerate overnight.  At this point, it was probably a good idea Jay didn't participate.  He was telling his co-workers, dessert pizza was a regular pizza crust (i.e. savory crust) with chocolate on top.  The overall response to this was not pleasant.  I informed Jay of his error, and told him to assure his co-workers I would be making it not him :)

So here it is, my version of dessert pizza.  I chose peanut butter cups, Snickers, and Twix for toppings.  You choose what ever meets your fancy.  Be creative, use Mounds or Almond Joy and coconut flakes, the possibilities are endless! Linking to these parties.

recipe for crust

2 Sticks of butter
1 C. Sugar
2 Eggs
3 Egg Yolks
1 Tbsp. Vanilla
1/4 tsp. salt
2  tsp. baking powder
3 1/2 C. Flour
Cream together sugar and butter, add eggs and vanilla.  Slowly add dry ingredients until dough forms.  Press the dough into a pizza pan sprayed with baking spray. I used a 12" pan, and used about 3/4 of the dough. (you can cut the remaining dough into cut outs or freeze for another day.)  If using a larger pizza pan, you will use all the dough for the crust. Refrigerate for several hours or overnight.


Preheat oven to 375 degrees.  Bake crust for 17-19 minutes or until edges are lightly browned.  Allow to cool.

recipe for ganache

1 cup of chocolate chips
3/4 cup heavy cream

In a double boiler (I used a metal bowl over a simmering pot of water), melt chocolate chips and heavy cream.  Set aside and allow to cool to room temperature.  Spread ganache over cooled crust.


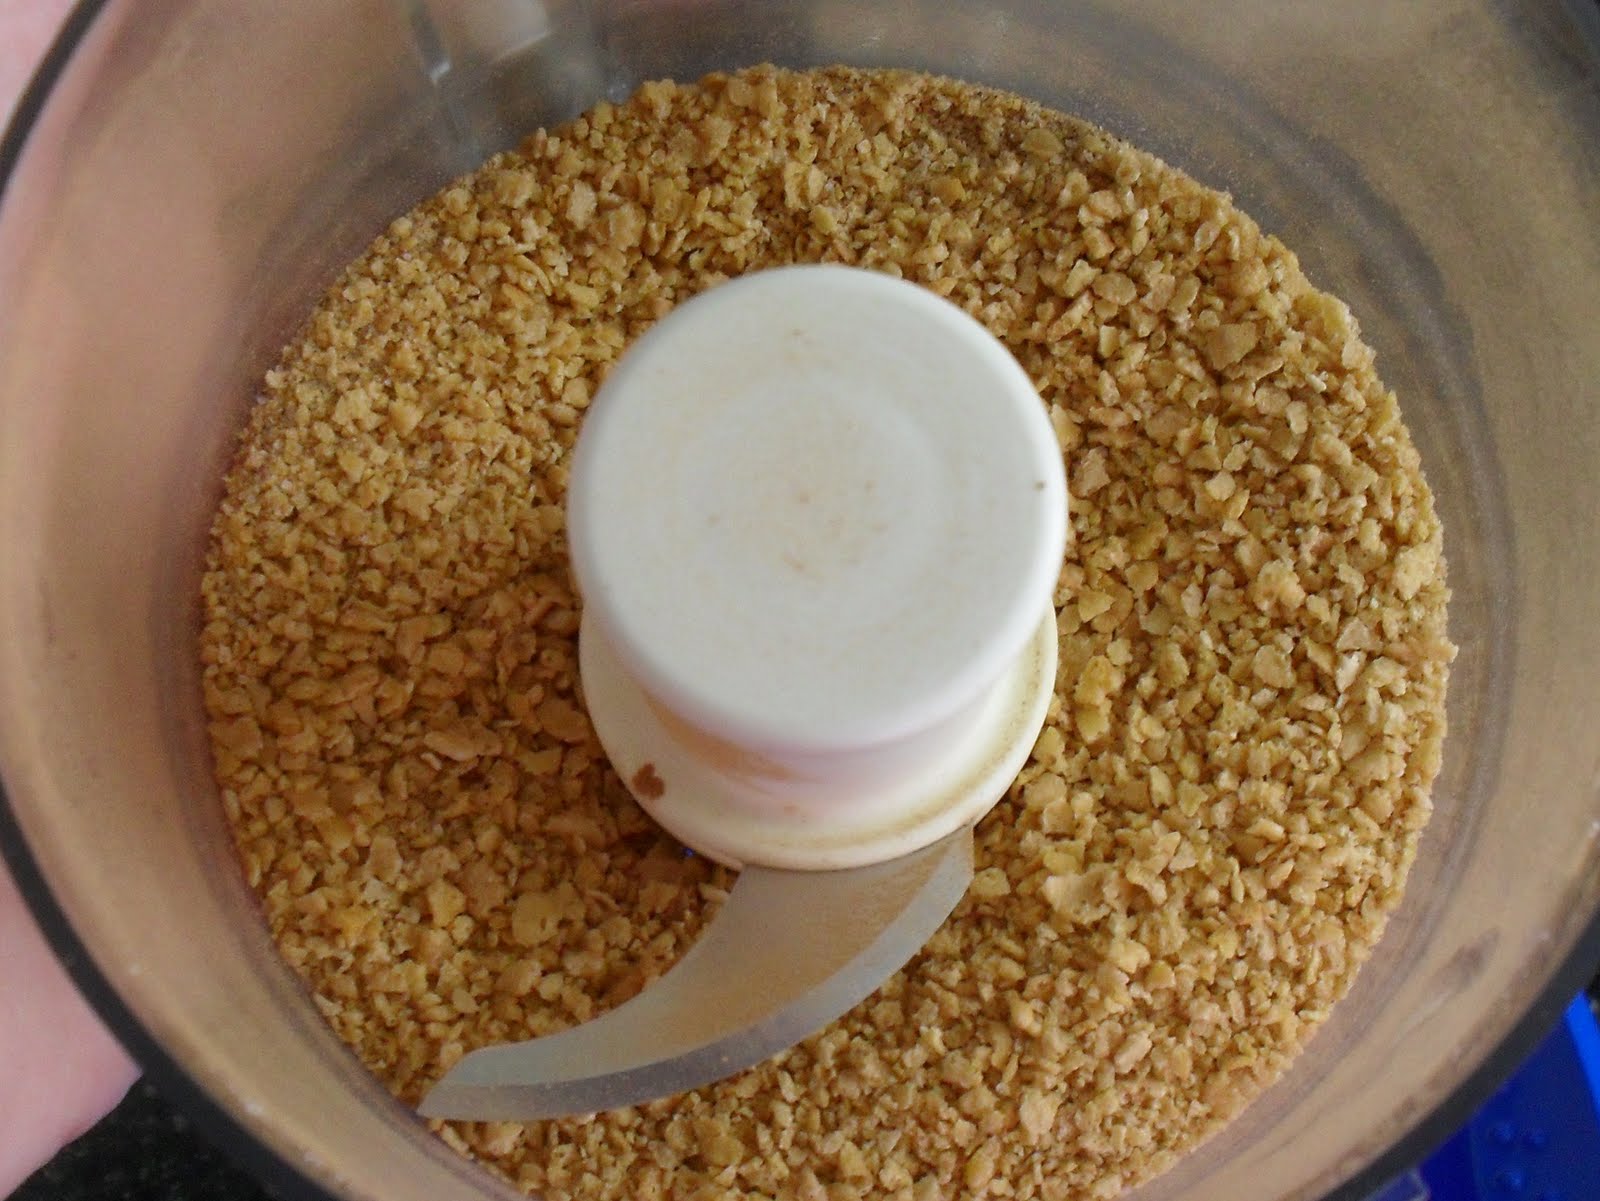
Chop candy bars into bite size pieces.  I used 24 fun size candy bars in three different flavors.


Top the pizza with candy bars.


To finish the pizza, melt about 1/2 cup of white chocolate and drizzle.  Keep the pizza refrigerated until ready to serve.  Cut into classic slices.


On a side note, in case you are wondering what I did with the extra egg whites from the crust, I made an egg white omelet.


Saturday, July 23, 2011

Fried Ice Cream

Like the rest of the country we have been suffering with unbearable temperatures.  So what do you do when it is so hot??? Go out for ice cream, of course.  Here in Oneonta, we have so many options. There are the popular chain ice cream franchises and our favorite the mom n pop stands.  We decided on the Golden Gurnsey. 

My absolute favorite item there is fried ice cream.  So I get to the counter order for the kids and Jay, no problem, then order for myself and PROBLEM!  There are out of fried ice cream.  I stood there for a moment contemplating another choice, and then decided on nothing.  I was pouting, if I couldn't have the fried ice cream, I wasn't going to have anything at all.

I was really crabby about it the rest of the night.  Then it hit me, make it yourself.  I have done it before, but the heat must of fried my brain and I forgot.  So the next morning I made the ice cream balls; let them set up in the freezer.  Last night we all enjoyed fried ice cream.

It is really simple.  It takes a few steps and a little planning, but it's not rocket science.  I'm not sure exactly how other people make their fried ice cream, but this is my take on it.

recipe

2 C. Corn Flakes, plain
2 T. Sugar
2 tsp. Cinnamon
Vanilla Ice Cream
1 Flour Tortilla
Whipped Cream and Dessert Topping for garnish

In a small bowl, combine sugar and cinnamon.  Take half of the cinnamon sugar, and in a food processor combine sugar and corn flakes. Pulse until you have a fine crumb.


Line a cookie sheet with parchment or waxed paper.  Using a standard ice cream scoop, about 1/2 c., scoop balls of vanilla ice cream.  With your hands quickly form a round ball about the size of a baseball.  Then roll immediately into cornflake mixture, coating evenly.  Place on cookie sheet and freeze for several hours. (This should be enough crumb for 4 servings.)

When you are ready to serve dessert, heat about 1/4 inch of vegetable oil in a skillet.  Cut the flour tortilla into eight wedges. (I use a pizza cutter to make quick even pieces.)


Fry the tortilla in hot oil for about 30 seconds per side.  Fry only a few pieces at a time so you don't crowd the pan.  Lay on paper towels and dust with remaining cinnamon sugar while they are hot.


Next it's just assembly.  Place a few tortilla pieces on a plate, put ice cream ball on top, and drizzle with dessert topping and whipped cream. 
Linking to these parties.

Sunday, July 17, 2011

Tracy's Strawberry Pie

Several years ago, my sister-in-law Tracy made a strawberry pie that I fell in love with.  She told me it was very simple, which is what I need.  Although I can bake a mean cupcake or a fabulous cookie, pies still elude me.  My pies come out with only 50% accuracy.

Well, this pie is easy and Lisa proof.  It starts with a ready made pie crust that you just thaw and bake.  Then if you can measure ingredients and slice strawberries you can make this pie. 

So when I was home in Buffalo a couple of weeks ago, I asked Tracy if she was making the pie anytime soon.  I've wanted to post this recipe since I started the blog, but I needed pictures.  Of course I could just make the pie and take my own photos, but then I would most likely consume the whole pie myself.  That would not be good for my waistline!

Tracy was not making the pie soon, so I immediately started thinking of an excuse to make it myself.  Enter in dinner with friends this evening.  We are grilling simple burgers and hot dogs, so I figured this would be a light refreshing ending to dinner.  I made the pie yesterday, took pictures for the blog, and of course sampled one piece. (I had to make sure it still tasted as I remembered ;o)

ingredients

ready made 9 inch frozen pie crust
4 C. strawberries
1/2 C. plus 2 T. sugar
3 T. cornstarch
1/2 C. cold water
1 T. butter
dash of salt
1 T. lemon juice

Thaw and bake pie crust according to package instructions.  Allow to cool completely.  Sort through berries, reserving about a dozen nice looking berries. 

Hull and slice the remaining berries and crush slightly. 


In a small bowl, dissolve cornstarch with the water.  Add cornstarch mixture with crushed berries and sugar in a medium stock pot.  Cook over low heat, stirring constantly until mixture thickens and becomes clear.

waiting to thicken
Add butter, salt, and lemon juice.  Stir until completely combined.  Allow to cool completely.


Slice the remaining strawberries in half.  Line the cooled crust with berries.  Pour cooled filling over strawberries and crust. 


Refrigerate and serve with whipped cream!

Sunday, June 19, 2011

Funnel Cakes

Father's Day in our house was celebrated with surf n' turf.  I prepared lobster tails, while Jay prepared the steaks.  After dinner, I wanted to make something special for dessert.  I thought an appropriate summer time treat was funnel cakes.

We have enjoyed funnel cakes in our home for years.  Most people treat themselves to this sweet dough at a fair or carnival.  In all honesty it is so simple and inexpensive to make , there is no reason not to enjoy them more often at home.

If you have the ingredients to make pancakes or waffles, you can make funnel cakes.  As for the toppings, anything goes.  We use cinnamon sugar, powder sugar, fresh berries, whipped cream, or chocolate syrup.  Anything you top an ice cream sundae with, you can top a funnel cake.  Go ahead and gives these a try.  The only problem is, your family will beg for you to make them all the time :o)

Linking to these parties.
recipe (makes approximately 5 cakes)

1 1/4 C. unsifted flour
2 T. sugar
1 tsp. baking soda
3/4 tsp. baking powder
1/4 tsp. salt
1 egg
3/4 C. milk (I used skim)

Vegetable oil for frying. The amount you use depends on the depth of the pan.  I used a 1 1/2 qt. pan and filled it about 2 inches high, approximately 1 1/2 C. oil.

In a large bowl, preferably one with a pour spout, combine all the ingredients.  Mix well. If your bowl does not have a pour spout, you can transfer the batter to a large squeeze bottle.

In a medium stock pot, fill with about 2 to 3 inches of vegetable oil. Heat over medium heat, until you reach 350 degrees.  If you don't have a thermometer, drop a teaspoon of batter into the oil, if it bubbles up immediately, the oil is hot enough.

Once the oil is hot, in a circular motion, drizzle the batter.  Then change directions and pour back and forth.  This creates the funnel cake pattern, with some holes in it.  Fry in the oil until golden brown (about 2 minutes), then flip over with tongs or large metal spoon.  Cook on the other side another minute or two. 

Remove from oil and drain on paper towels.  Top immediately with sugars, fruit, or syrups.  Serve warm.

Use a small sauce pot, the size of the pan determines the size of the cake


Mine topped with berries

Jay's topped with a lot of sugar!

Adam being patient, while I take pictures for the blog :o)

Tuesday, June 14, 2011

Rainbow Cake

As you saw in my previous post, we had a magical birthday extravaganza.  Adam's request for his birthday cake was it had to be rainbow.  Back in March, I had posted a rainbow cupcake for Cupcake Spotlight and Adam told me then, that's what he wanted for his birthday.

The process is quite simple and the effect is very special.  Don't limit yourself to just rainbow colors either.  For a princess party, use pink, purple and white. For the 4th of July use white, red, and blue.  The possibilities are endless.

recipe

1 white or yellow cake mix, prepared according to box instructions
food color, I used Betty Crocker gel colors
2- 8 inch cake pans


Preheat oven to 350 degrees. Prepare cake mix according to package instructions.  Next divide the batter into six even amounts.  My cake mix yielded 5 cups so I had approximately six bowls filled with 3/4 c. each.  Using gel colors, tint the batter to desired colors.


Next with your greased cake pans, start pouring three of the colors into a pan.  This requires a slight bit of thinking. You want to put colors that compliment each other in the same pan.  For example, I poured the red, yellow, and orange together.  Then the blue, green, and purple.  Pour one color at a time directly into the center of the pan. Don't worry about spreading it or making it even, they colors will level themselves out as you pour.


Bake according the package instructions.  Allow to cool on a rack for 10 to 15 minutes. Then remove from pan an allow to cool to room temperature on a baking rack.

Frost and decorate with your favorite frosting and sprinkles.

***If you are doing cupcakes pour approximately one teaspoon of each color into each cupcake well.  One teaspoon of all six colors, fills it about 2/3 full. Bake according to cupcake instructions.***

Rainbow Cupcakes


Wednesday, May 25, 2011

Patriotic Cookies

It's not too late to make a sweet treat for this weekend.  Are you invited to a picnic or having guests over?  This is a perfect end to a day of festivities.  I have shared this recipe before, but wanted to give a few extra tips for making them even easier.

Recipe for cake like cookies.

Here are a few tips:

  • If you are in a rush and can't make your own frosting, go ahead and cheat with store bought frosting.  I feel if part of the dessert is homemade (like the cookie) you can get by with a canned frosting.
  • Make sure to use a generous amount of frosting. The one thing that is so delicious about these cookies is the thick layer of frosting.
  • If you are freezing the cookies, go ahead and flash freeze them on the cookie sheet before stacking them in a container.  Use parchment paper in between layers to prevent sticking upon thawing.
  • If making them for a crowd use a small circle cutter (about 2 inches).  The smaller size is easier to eat at a picnic and allows people to try several flavors.
  • Want to change up the  flavor combination?  Try adding 1 tsp of lemon extract or almond extract to the dough instead of vanilla.
Another great benefit of making these cookies yourself is you can control the quality of ingredients.  Also, the store bought version has a disclaimer for nut allergies, make them yourself and you can be nut free!

I didn't really need to show how to cream sugar and butter. This picture is just a ploy to show my new hot pink mixer ;o)

I used a biscuit cutter to make perfect circles.

Saturday, April 23, 2011

Lemon Bars

I have been such a good girl this Lenten season.  I gave up sweets for Lent, and oh was it hard.  Tomorrow, on Easter we will be having chocolate fondue for dinner. Yes people, I said dinner not dessert.  I am going to celebrate with a food fest of yummy goodies dipped in molten chocolate.

Before Easter dinner, I will be taking the children to church for an Easter breakfast and egg hunt.  For the breakfast, the parishioners bring baked goods to share.  I have decided to make lemon bars.  I figured if I was indulging in chocolate in the evening, I would go with something light for breakfast.

These lemon bars are very traditional with simple ingredients.  You probably have everything in your pantry except perhaps the lemons.  Make a quick trip to the grocery store and you are all set.  You can cut the squares small and get 20 or cut them medium and get about 15.  The only thing I did different from the traditional recipe is cut back on the sugar.  You need a good amount of sugar to off set the tartness of the lemons, but the called for three cups seemed a little much.  I scaled it back and they are still lemony and sweet.

Happy Holidays!!

crust recipe

2 sticks softened butter
1/2 c. sugar
2 c. flour
1 tsp. vanilla

In a large mixer, cream together the sugar and butter until light and fluffy.  Add vanilla and flour until dough just comes together.  On a floured surface, mound the dough into a ball.  In a lightly greased 9x13x2 pan, press the dough into the bottom of the pan evenly.  Refrigerate for 30 minutes.  In a preheated 350 degree oven, bake the crust for 15 to 17 minutes, until lightly browned.  Set the pan on a cooling rack and prepare filling.

filling recipe

6 extra large or jumbo eggs, room temperature
2 1/4 c. sugar
2 tbsp. lemon zest, 4 to 6 lemons
1 c. freshly squeezed lemon juice, 6 to 9 lemons
1 c. flour
powder sugar and berries for garnish

Whisk together eggs, sugar, lemon zest, lemon juice, and flour.  Make sure all the ingredients are completely combined.  Pour over crust and bake for 30 to 35 minutes, until the filling is just set.  Let cool to room temperature.

Dust with powder sugar and berries before serving.  Refrigerate any leftovers in an airtight container.

Wednesday, April 13, 2011

Triple Chocolate Chip Muffins

Do you ever fantasize about what you would do if you won the lottery?  I do.  I have a life long dream of opening a bakery/cafe.  I would love to have a showcase of everyday treats like cookies, brownies, and cupcakes.  Then I would have a luncheon menu featuring salads, sandwiches and soups.  The cafe would only be open until about 3 p.m.  Allowing some free time in the evenings for family. 

Well until I hit the lottery or come across a benefactor, I spend my time perfecting recipes.  I also try out new baking equipment.  Today, I baked triple chocolate chip muffins in my new Rachael Ray square muffin pan. 

The muffins were a success among the men in the house.  Moist and chocolaty, what more can you ask for!  Please give these a try, and who knows maybe someday you will find them in a showcase of my bakery.  What are your dreams? Linking to these parties.

recipe

2 c. flour
1/2 c. packed brown sugar
1 tbsp. baking powder
pinch of salt
2 eggs
6 tbsp. butter, melted and cooled
1 tsp. vanilla
1 c. plain low-fat yogurt or sour cream
1/4 c. milk chocolate chips
1/4 c. semi-sweet chocolate chips
1/4 c. white chocolate chips

Sift together dry ingredients, make a well and set aside.  In a another bowl whisk together all the wet ingredients.  With a spatula fold the wet ingredients into the dry, until just mixed.  Fold in the chocolate.  Scoop into 12 muffin cups and bake in a preheated 400 degree oven for 18 to 20 minutes.  Allow to cool on a cooling rack.  Store in an airtight container.


Sunday, February 13, 2011

Happy Valentine's Day!

We celebrated Valentine's Day early in our house.  Between school and work on Monday, it seemed logical to celebrate on Saturday.  Jay took us to dinner at a local restaurant called The Depot (very good family friendly food), and I made a Valentine cake for the boys.  Brandon picked the cake flavor and Adam picked the frosting.  So what did they come up with???? Chocolate cake with peanut butter frosting, and I baked it in a heart pan, just for fun.

The cake was just a simple box cake mix.  The frosting was home made, creamy, and delicious.  I took a basic butter cream recipe, cut down the sugar a bit, added peanut butter, and a little half and half to thin the texture.  This would also be great as a filling in between a layer cake.  I hope everyone has a great Valentine's Day and remembers to tell someone special, "I love you!!!"

recipe (yields enough to frost 8 or 9 inch cake)

peanut butter frosting

1 stick unsalted butter, softened
2 c. powder sugar
1/2 c. creamy peanut butter
1 tsp. vanilla
3 tbsp. half and half (you can also use milk or heavy cream)

In a large mixing bowl cream the butter and peanut butter until smooth.  Slowly add the sugar and vanilla.  Finally add the half and half one tablespoon at a time, until you reach desired consistency. 

Saturday, January 22, 2011

Fudgy Brownies

My dad was in town yesterday fixing my elliptical, YEAH!!!  I am so happy to have it back.  What does that have to do with today's post you ask??? Well, I always pay my day with food, seeing he would never take money.  We have a standing joke that when he finishes one project he has earned dinner, and if he finishes a second her earns dessert.  Yesterday he earned dinner and dessert. 

I didn't really have a dessert planned, mainly because I have been watching my weight, and just haven't been making a lot of sweets.  While dinner (crab cakes) was cooking, I whipped up an easy fudgy brownie.  This would fill the bill for dessert for my dad, and a play date snack the next day with one of Adam's friends.  The recipe is easy and you probably have all the ingredients in your pantry.

recipe (serves 12)

1 stick of butter
1 c. flour
1/4 c. unsweetened cocoa
1/2 tsp. baking powder
1/2 tsp. salt
8 oz. chocolate (I used milk chocolate chips)
1 1/4 c. sugar
3 eggs
1 tsp. vanilla

Preheat oven to 350 degrees.  Melt butter, cocoa powder, and chocolate chips over a double boiler. Set aside to cool a bit.  Cream sugar and eggs until fluffy.  Slowly add the cooled chocolate mixture and stir to combine.  Add dry ingredients until just mixed. Bake in a greased 9x9 pan for 42 to 45 minutes.  Be careful not to over bake.  The edges will be slightly crispy but the center should be a little soft.

Pa and Brandon snuggling

Adam helping Pa fix electrical

Linking to these parties.

Wednesday, January 19, 2011

Chocolate Pastry Puffs

I am so so sorry to my blog. I have been very neglectful lately.  In my defense, I have had a strange couple of weeks.  We have had snow days out of the blue, doctors visits, and just a bunch of little things that have distracted me.  I am trying to get back on track, and today's little gem is a goodie.  Now I know Wednesdays are supposed to provide a wholesome treasure, but I just didn't feel like it today.  Please don't judge me, but I really want something really unhealthy today.

My inspiration for the chocolate pastry puffs comes from a famous bakery chain Au Bon Pain.  On my first trip to New York City, we stayed in a little boutique hotel near Union Square.  Every morning Jay and I would go to Au Bon Pain and get breakfast and take it to the park to enjoy.  Most mornings I tried to be healthy and get fresh fruit and a bagel, but one day I strayed. I ordered a chocolate croissant, and oh my it was so delicious!  I am not going to even attempt making croissants and then filling it with chocolate, too much work. However, I can easily defrost puff pastry and fill with chocolate chips and sweetened cream cheese.

As I was going through my freezer, I discovered I had a sheet of puff pastry left over from the beef wellingtons.  I always have cream cheese and chocolate chips in the house, viola my little pastry puffs were born.  The recipe will make six little puffs and uses one sheet of puff pastry, but if you would like to thaw out the whole box, just double the cream cheese and chocolate chips.  These are great for parties.

recipe (yields six pastry puffs)

1 sheet frozen puff pastry, thawed
2 oz cream cheese, room temperature
1 tbsp. powder sugar
1/2 tsp. vanilla
1/8 c. chocolate chips, plus an additional 1/4 c. melted for drizzle
1 egg, for egg wash

Preheat the oven to 400 degrees.  Unroll the thawed puff pastry, cut into six rectangles, and lay on an ungreased cookie sheet.  In a small bowl, stir cream cheese, sugar and vanilla together.  Evenly spoon mixture among the pastry, about 1/2 teaspoon each.  Sprinkle about 6 to 8 chocolate chips on each pastry. Fold in half and crimp the edges with a fork.  Cut a small slit in the top of the pastry to allow steam to escape.  Brush with egg wash, 1 egg with tablespoon of water whisked, and bake for 14 to 16 minutes. The pastry will be golden brown and puffed.

Allow to cool on a rack.  Meanwhile, in a microwave safe bowl, melt the remaining chocolate chips until smooth. Heat on high in 30 second intervals.  Drizzle over the top of the pastry with a fork.  Serve at room temperature.


Linking to these parties.

Monday, November 1, 2010

Cupcake of the Month for November

It's November 1st and the latest edition of Cupcake Spotlight!  I can not take credit for this recipe, as it was told to me years ago. I can take credit for the frosting and garnish combination with the cupcake.  So for a little history on the cake portion. I was at a craft show about four years ago, and while having a conversation with customer, we got on the subject of baking.  She had recently lost a lot of weight, but confessed her love of sweets.  She told me to make a simple cake, just take one package of spice cake mix and add one can of pumpkin puree, mix and bake according to package instructions for a bundt.  A couple of weeks later I did.  The recipe is delicious and super moist.  I liked that fact it had no egg or oil, making it heart healthy as well.

Over the years I have shared this recipe with a slew of people.  Friends have tried it and added powder sugar to the top or a cream cheese drizzle.  I even had one person add chocolate chips and said it fabulous.  I decided to make it into cupcakes topped with an orange cream cheese frosting, garnished with a candied orange peel.  This recipe is easy and a big crowd pleaser.  Go ahead and try it for Thanksgiving instead of the traditional pumpkin pie, it will be a hit!

Linking to these parties.

Tuesday, October 19, 2010

Ghostly Treats

On this coming Sunday, I will be helping our church with our annual Halloween Party. I will be dressed as a nice witch and helping with the toddler games. I really can't wait!  As a good witch I decided to make some treats for my cauldron. I thought about making spiders, but I was afraid the legs would brake off, so I settled on ghost cookies.

In the recent months I have found several blogs I absolutely adore.  One in particular, from Denmark, is fabulous and has so many great cookie and cake designs.  Browsing her tutorials, I saw the remarkable sugar cookies, that are decorated very nicely. She uses royal icing, pipes the border, then floods them. They are spectacular!!!

Flooding.....this brought me back to my days of the Wilton cake decorating classes I took in my 20's.  We learned how to flood, and honestly, I didn't like it. It was messy and I always got air bubbles.  Well, I read this particular guide on how to decorate cookies, and there seemed to be some useful tips.  I decided to give it a whirl.  To my surprise, the tips helped and the ghosts came out very cute and neat.

Three tips in particular helped me last night. The first was to use a hand mixer with the dough hook attachments to make the frosting. I don't know why this works, but it was a breeze. The second was to let the royal icing rest after thinning it for flooding, to let the air bubbles come to the surface.  Finally, putting the icing in a squeeze bottle gave me excellent control when flooding.

I'm going to give the link for the tutorial on working with royal frosting, as she does an excellent step by step guide. Also the sugar cookie recipe I am sharing is a basic shortbread recipe with a few twists. It's a recipe I have been given by a dear friend, but I changed a few things. The result is a cookie that holds up great for cutting out, but also has a tender texture.

Working With Royal Icing By The Cake Journal

sugar cookie recipe

3 sticks of unsalted butter at room temperature
2 eggs
1/2 cup powder sugar
1/2 cup sugar (i used vanilla sugar)
1 tsp vanilla
1/2 tsp salt
3 3/4 cups of flour

Cream together sugar and butter until fluffy.  Add eggs, vanilla, salt and flour. Mix until forms soft dough.  (do not over mix or the cookies will spread during baking). Divide into two discs, wrap in plastic and refrigerate at least two hours.

Preheat oven to 375 degrees.  Roll out dough on a floured surface to 1/4 inch thickness. Cut out desired shape, place on greased cookie sheet, and bake 13 to 15 minutes, depending on size.  Don't over bake, the top of the cookie will be pale, but golden on the bottom.  Allow to cool completely on a cooling rack.

If you are cutting all the cookies at once, keep the sheets refrigerated until ready to bake. If the dough is too warm, it will spread and not hold its shape.

Decorate as desired. I used mini chocolate chips for the eyes on the ghosts. Get creative and fun with this!
tray full of ghosts