Tuesday, May 13, 2014

A Little TARTE!

I try to pass on helpful information when I find it.  Today's helpful info comes in the form of a great make-up purchase.

I was born a blonde hair blue eyed baby.  I stayed blue eyed until about 4 years old, which then changed to green eyed.  I stayed blonde until about nineteen.  Then I resumed being blonde at about 20 with the help of bleach and foils. 

While my hair became darker over the years, my very sparse eyebrows and eyelashes remained blonde.  So, if I don't wear a  make-up, I look very tired, pale, and even a little under the weather. 

I found this on Pinterest and laughed so hard, because it is so true!


OK, now on to my purchase.  I always need to remember the three "E's": eyebrows, eyelashes, eyeliner. My pursuit of finding a great a eyeliner took many years.  I have tried a lot of high end brands as well as drug store brands.  What one do I deem perfection? The TARTE Amazonian Clay Waterproof Cream Eyeliner.


It comes in a little pot and you apply it with a brush.  I had a two day learning curve, but after that I was off to the races.  It's very creamy and glides on without tugging.  That is important because as I age, I really don't want any more wrinkles around the eyes.  However, the one component that is most important to me, is that the eyeliner is truly water proof.  This one is.

Go ahead and give it a try.  I bought mine at QVC (of course) but you can also find it at Ulta and Sephora. I bought mine in bronze and love it!!!!


Tuesday, May 6, 2014

Battle Of The French Toast Scones

Scones.....we love them in our house.  They are great for breakfast, and scones are also wonderful to take to some one's house for brunch.  I have shared chocolate chip scones in the past, and this recipe is just another variation.

The battle today (well actually it was last week), was which way was better to top the scones??  The scone itself is the same in both versions.  However, the topping choices were cinnamon sugar or maple glaze.  Which one do you think won? 

After the results were tallied from three discerning judges, the winner was....drum roll please.....:

CINNAMON SUGAR

OK to be honest, if we counted my vote it would have been a tie.  Brandon and I liked the maple glaze, while Adam and Jay enjoyed the cinnamon sugar version.  You can be the judge in your household.  Give them both a try and let me know.

recipe

2  3/4 c. Bisquik Baking Mix (I use the heart healthy version)
1/2 c. skim milk
1/4 c. non-fat yogurt, plain or vanilla
3 tbsp. brown sugar
2 tsp. vanilla extract
2 tbsp. maple syrup

toppings:

2 tbsp. butter, room temperature
1/4 c. cinnamon sugar (1/4 c. white sugar with 1 tbsp. cinnamon added)

1/2 c. powder sugar
2 tbsp. maple syrup
1 tbsp. water

Preheat the oven to 450 degrees.  In a large bowl, combine all the ingredients with a spatula until a soft dough forms.  If the dough appears too sticky, add a few more tablespoons of baking mix.  The dough should be easy enough to handle without sticking to your hands.

Turn dough out onto a floured surface.  Shape into a circle about 1/2 inch thick and about 10 inches in diameter.  Cut into eight wedges; I use a pizza cutter.  Place onto a non-stick baking pan.  Bake for 13 to 15 minutes.

While the scones are baking prepare your toppings.  If you are topping with cinnamon sugar, just prepare the sugar and set aside.  If using the glaze, mix powder sugar, maple syrup and a few teaspoons of water with a fork. The glaze should be smooth and runny enough to drizzle.

Now onto topping the scones! To top with maple glaze, simply use a spoon and pour the glaze over the scone.  Allow to cool completely and the glaze will set up a bit. 

To top with cinnamon sugar, simply butter the top of the scone (like you would for toast) and sprinkle with a few teaspoons of cinnamon sugar.  Allow to cool completely.

Helpful tip:  I keep a container of cinnamon sugar at all times in my pantry.  I use it for toast, scones, or sprinkle on buttered waffles!

Tuesday, April 29, 2014

Inspiration At CMOG (Corning Museum of Glass)

Over the spring break we ventured to CMOG (Corning Museum of Glass).  We met friends from Oneonta and had a really wonderful day.  We watched a hot glass show, glass breaking show, and a flame work show.  On our visit we also had the opportunity to create our own design on a glass piece and then sandblast it, which was super fun too!

So, while at CMOG you have the opportunity to draw a design that may be featured during the flame work show.  Adam submitted a flower in a pot and Brandon submitted a cartoon-ish bear.  To our surprise both boys had their work chosen throughout the day. 

It was amazing watching the glass artist make the drawings come to life.  Adam's was first and the artist, Kaitlin, said she had never done a flower in a pot.  She was experimenting as she went along, but the end result was precious.


Then the last show of the day, Brandon's name was called.  He was excited to see his bear made into glass.  Kaitlin even captured the goofy little smile Brandon draws on all his animals.


The next day you are allowed to pick up the items or have them shipped if you are not in the area.  I chose to have them shipped, and they arrived a few days ago.  The museum also sends back the drawings, so it makes a wonderful keepsake.

I suggest to plan a visit to the museum if you are near Corning, NY (kids under 19 are free).  It was a lovely day, filled with fun shows, activities to participate in, exhibits of glass throughout the world and spanning centuries, and even a little cafĂ© to grab a bite to eat.

Monday, April 21, 2014

Fright Pencils

The faster you roll the pencil back and forth the crazier
the hair will get
I have very fond memories of my church growing up.  My mother was very involved, and I mean VERY involved.   She was Sunday School Superintendent, President of the UMW, and she held a seat on the Administrative Board.  So, by default my brother and I were also very involved in church. 

I worked countless church dinners, from scrubbing celery when I was about four years old to serving and cooking as I became older.   I was also involved in making small things for the church bazaar, and that is what brought back the memory of Fright Pencils!

So what is a Fright Pencil?  It's a pencil with a little personality. It can either be very calm with every "hair" in place, or it can become frightened and its hair goes a little haywire.  I remember buying these when I was younger, taking them school, and showing all my friends. 

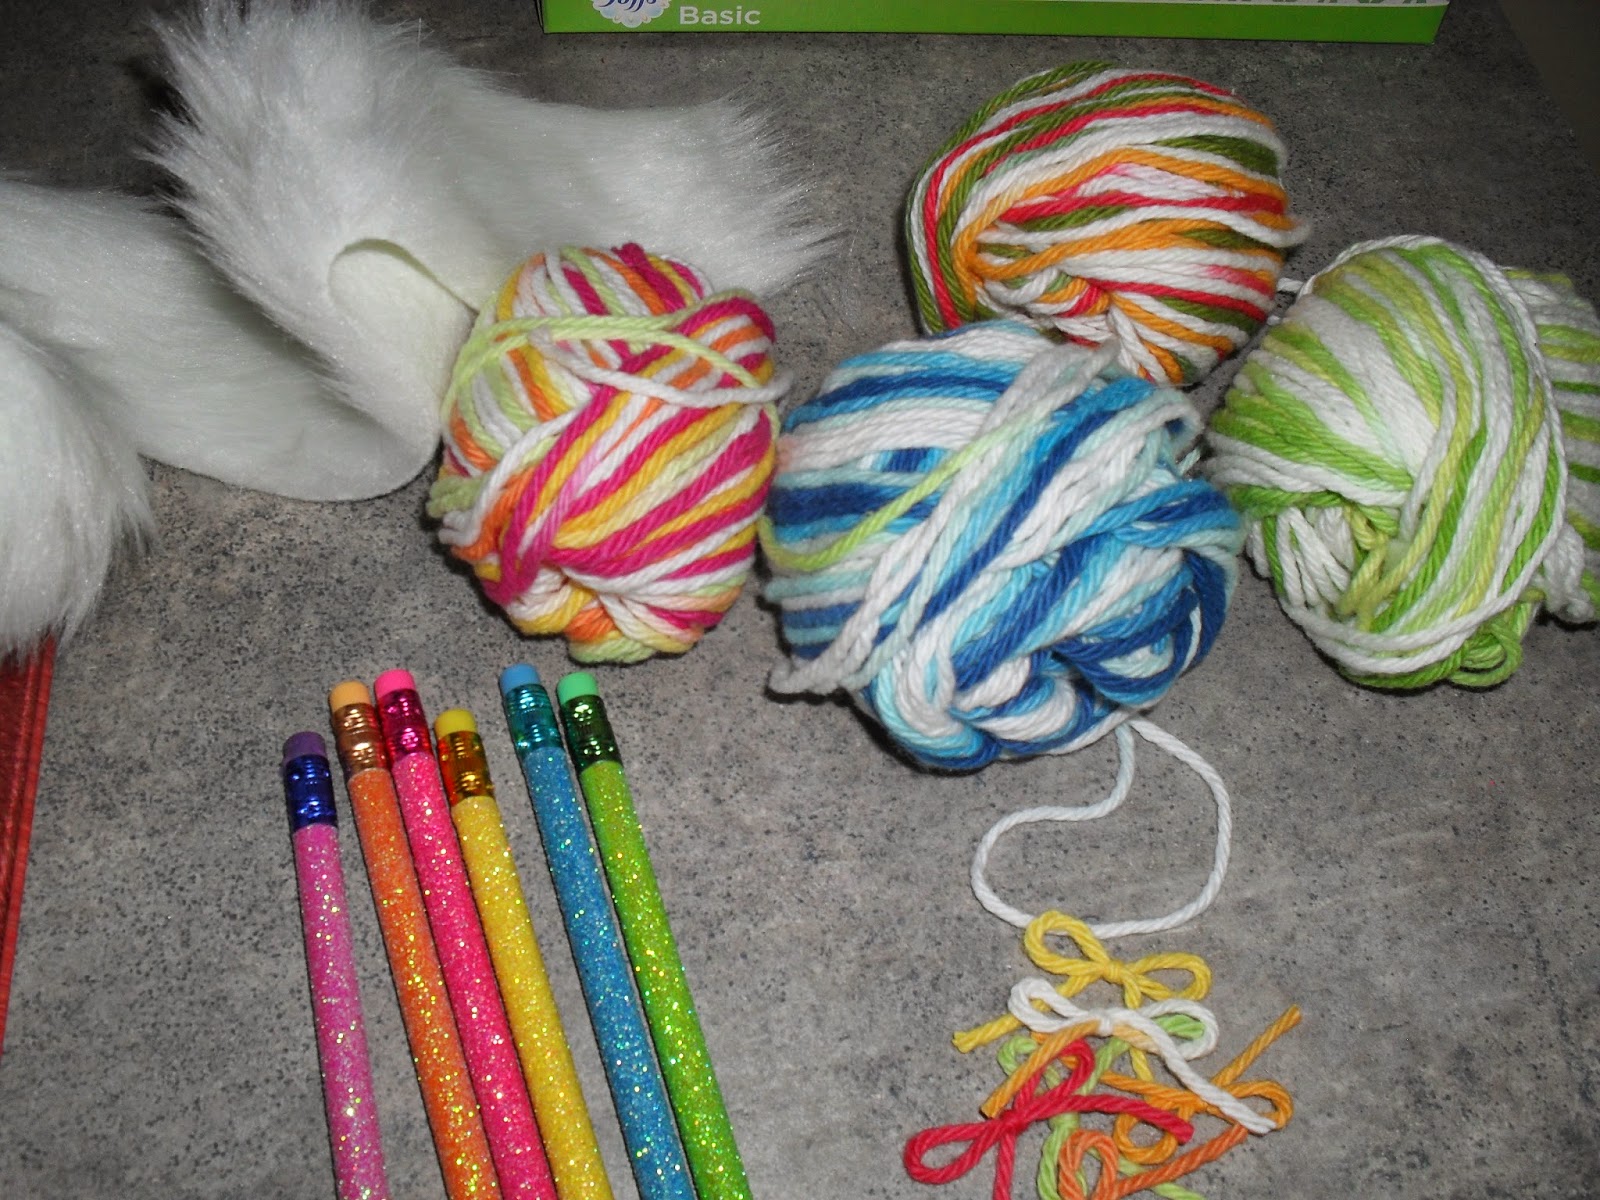
While unpacking my craft things, I discovered I had all the materials to make these for my boys.  They would be great for a party favor, or pass them out at school for a party.  With so many food allergies at schools, it can become very difficult to share edible treats.  Little items like Fright Pencils, make a nice alternative.

Here's what you need:

  • Pencils
  • Faux fur trim (about 1 1/2" to 2" in width)
  • yarn or ribbon to decorate
  • glue gun
  • white glue
  • scissors
  • wiggly eyes
First gather your supplies and start by cutting the fur trim in to 2 1/4" lengths.  The fur will shed a bit when cutting, so gently remove loose fur.


OK the now look at the fur square, it will look like the fur is growing in one direction.  With the "fur growth" pointing upward, apply a small amount of hot glue on the pencil right below the metal band under the eraser.  Wrap the fur around the pencil and apply another dab of hot glue to secure.  Add a yarn bow with hot glue at the bottom of the fur, to look like a bow tie.


Smooth the fur in an upward direction.  Now with the white glue apply the wiggly eyes; allow to dry overnight.


Your Fright Pencils are complete.  To make their hair go crazy simply, roll the pencil quickly back and forth between the palms of your hands.  The fur with stick out, then simply smooth it upward again to return to it's calm state :)

I also thought without the eyes, they look like the trees from the Lorax, especially if you can find different color fur trims.  Enjoy!

Tuesday, April 15, 2014

I'm Back!

It has been a year since I put My Little Blogspot to bed.  Over the last year so much has happened, and I have missed sharing our crazy lives, recipes, craft projects and tips.  In my last post I had mentioned about using up storage space, so I have spent time freeing up some space (and hopefully found the solution).  I deleted some pictures and posts.  Not to worry, all the recipes are in tact!

So I am going to give it another go.  Here's a brief overview of our last year:

  • Moved home
  • Went to Disney World (first time for me and the boys)
  • Went to Hawaii
  • Volunteering at the kids school
  • Endless time spent with family
  • Saw Billy Joel in concert at Madison Square Garden (bucket list item)
  • Rekindled my relationship with exercise
As you can see we have been busy.  Out of all the things on the list, the most treasured is the time spent with family.  I see my mom three to four times a week instead of three to four times a year :)

Stayed tuned for a tutorial on Fright Pencils, a cute craft that will surely be a hit with the kiddos.  In the meantime, I am thinking warm thoughts on this snowy April day!

Thursday, April 11, 2013

Post #262- Final Post

It's time to say good bye to My Little Blogspot.  It's been a great 3 years of sharing recipes and stories, but times are changing.

I will always have plenty of material to share unfortunately, Blogger is making it more difficult to do so.  I keep receiving messages about using up my storage and prompting me to buy more.  My answer to that is no.  This is a hobby and was never intended to cost money.

So My Little Blogspot will be available for viewing recipes, but I will not be posting any new information.

Thank you to all of my supporters!


Sunday, March 17, 2013

Talent Show

We have had a busy few weeks and they ended on a very good note.  Adam played his guitar in his school's talent show on Friday.  Now this isn't his first talent show.  He has been playing since Kindergarten, so this makes number three.  I am always astonished at how calm he is while performing.  He doesn't get that from me or Jay. 

All in all it went well.  The curtain got raised a bit too early, and he didn't have his place in his book or have his amplifier set up.  He played it cool and everyone thought the delay was an intentional part of the act.  I was a proud momma as he performed Greensleeves.


Have a happy week!